




How to Build a Home Gym: 2026 Setup Guide
Table of Contents
- Why Building a Home Gym Beats Gym Memberships in 2026
- Home Gym Space Planning: Start With Square Footage
- The Essential Home Gym Checklist: Equipment That Earns Its Spot
- Best Budget Home Gym Equipment That Won't Break the Bank
- Flooring, Lighting, and Ventilation: The Setup Details Most People Skip
- Soundproofing, Power, and Storage: The Hidden Logistics
- Your Step-by-Step Plan to Build a Home Gym This Month
- Final Word: Start Training, Stop Overthinking
- Frequently Asked Questions
Last Updated: September 5, 2026
The global home fitness equipment market is projected to grow from $12.88 billion in 2025 to $22.99 billion by 2034, according to Fortune Business Insights' 2026 Home Fitness Equipment Market Report. That growth is driven by people who are done paying for crowded floors and shared equipment. This guide from Tiger Fitness shows you exactly how to build a home gym that fits your space, your goals, and your budget without wasting money on gear you will never touch.
Most guys overthink this. They price out a full power rack, leg press, and lat pulldown, then quit when the total hits five figures. Building a home gym is about matching equipment to your actual training style.
Why Building a Home Gym Beats Gym Memberships in 2026
A home gym eliminates commute time, wait times for the squat rack, and annual membership creep. You train on your schedule, not the gym's.
A commercial membership runs several hundred dollars per year, and that figure climbs with initiation fees and annual increases. Quality home equipment holds resale value, so your upfront investment is partially recoverable if you ever sell.
Home Gym Space Planning: Start With Square Footage
Industry guidance for 2026 suggests that a compact, functional in-home gym can be established in a space as small as 80 to 150 square feet, per Push Pedal Pull's 2026 home gym setup guide. That is roughly the size of a one-car garage or a large spare bedroom. You do not need a warehouse; you need a plan.
Measure your space before you buy anything. A standard 7-foot Olympic barbell needs about 8 feet of linear clearance for loading plates. A power rack footprint runs roughly 4 by 4 feet for a half-rack or 4 by 7 feet for a full cage with a pull-up bar.
Ceiling height matters more than most beginners realize. If you plan to press overhead or do pull-ups, you need at least 8.5 feet of clearance. Measure floor to joist, not floor to drywall.
Watch Out Skipping the measurement phase is the most common mistake in home gym construction. A rack that fits on paper but blocks a door swing or sits under a low ceiling will ruin your training space. Measure twice, buy once.
The Essential Home Gym Checklist: Equipment That Earns Its Spot
The essential home gym checklist comes down to a simple rule: buy equipment that supports your main lifts first, then add accessories. A power rack, a weight bench, an Olympic barbell, and weight plates form the core of any serious strength setup.
Core Strength Equipment
A squat rack or power rack is the anchor of the gym. It keeps you safe on heavy squats and provides a pull-up bar and attachment points for bands and accessories. Pair it with an adjustable weight bench that supports incline, flat, and decline pressing.
Dumbbells earn their keep for accessory work and unilateral training. A full set from 5 to 50 pounds handles most movements, but adjustable dumbbells save significant floor space.
Cardio and Conditioning
Cardio equipment should serve your goals, not collect dust. A jump rope costs almost nothing and delivers serious conditioning work. A rowing machine or assault bike provides low-impact intervals that spare your joints while hammering your lungs.
| Equipment | Space Needed | Priority | Best For |
|---|---|---|---|
| Power Rack | 4x4 ft | Essential | Squats, pull-ups, safety |
| Olympic Barbell | 7 ft length | Essential | Main lifts |
| Weight Plates | Storage area | Essential | Progressive overload |
| Adjustable Bench | 4x2 ft | Essential | Pressing movements |
| Dumbbells | Storage rack | High | Accessory work |
| Rowing Machine | 8x2 ft | Optional | Conditioning |
Best Budget Home Gym Equipment That Won't Break the Bank
Current industry advice for 2026 indicates that individuals should anticipate spending over $1,000 to acquire quality equipment when starting a home gym setup, according to Gray Matter Lifting's 2026 home gym cost guide. That number climbs fast if you buy new premium gear, but smart shopping keeps the total manageable.
The best budget home gym equipment starts with a used market search. Barbells, weight plates, and power racks are durable goods that survive decades of use. Buying used cuts costs by 30 to 50 percent compared to retail.
New budget friendly options exist too. Resistance bands and adjustable dumbbells deliver serious training stimulus for under a few hundred dollars. A pull-up bar that mounts in a doorframe costs less than a month of gym membership.

A common mistake is over-purchasing, according to Testify Strength & Conditioning's advice on home gym equipment. Experts warn against filling a room with unused gear; focus on specific fitness goals and space constraints instead. One quality barbell beats five machines you never touch.
Pro Tip Start with a used power rack and barbell, then buy a new bench and plates. The rack and bar take the most abuse, so buying them used saves the most money. The bench takes less abuse and is worth buying new for safety and comfort.
Flooring, Lighting, and Ventilation: The Setup Details Most People Skip
Most guides tell you to get rubber flooring and a fan. They don't tell you that the wrong rubber will off-gas for weeks, that your lighting choice can cause eye strain during heavy sets, or that your ventilation plan needs to handle the specific heat and humidity load of a workout.
Flooring: The Material Science of Impact Protection
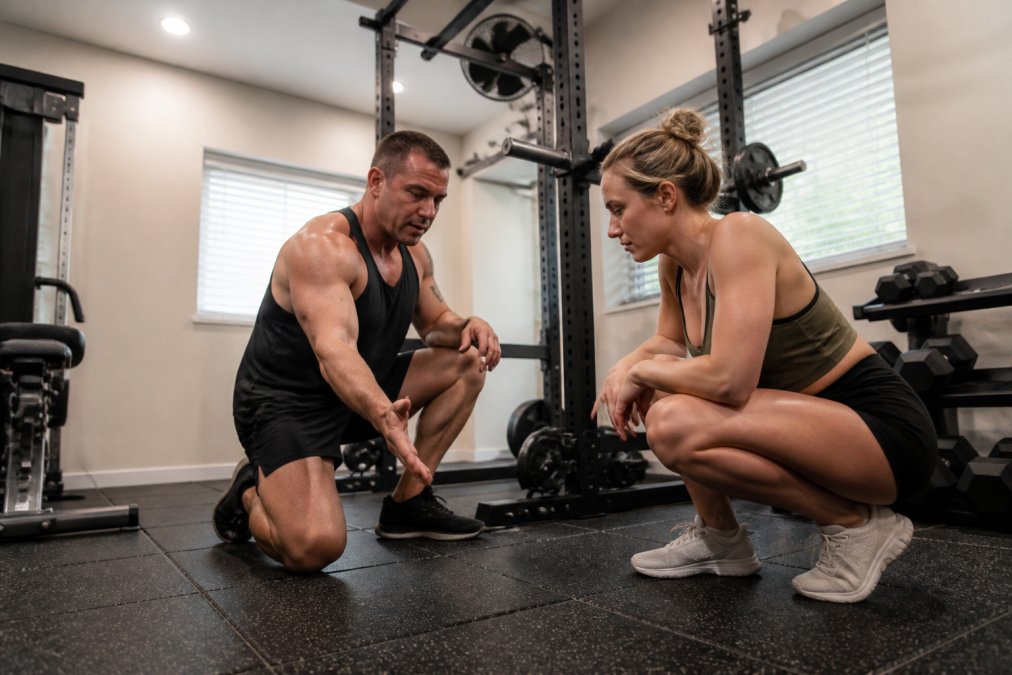
The floor is your first line of defense against equipment damage, injury, and noise complaints. The choice isn't just 'rubber mat.' It's a decision between different polymer chemistries with different densities, durabilities, and costs.
Rolled Rubber vs. Interlocking Tiles vs. Horse Stall Mats
- Rolled Rubber (3/8-inch to 1/2-inch): The commercial gym standard. Provides a seamless, dense surface that handles heavy deadlifts and dropped weights. The downside is installation; it requires adhesive and a perfectly smooth subfloor. A 4x6-foot, 3/4-inch thick mat weighs around 100 pounds, so you'll need help moving it.
- Interlocking Rubber Tiles (1/2-inch to 3/4-inch): The most DIY-friendly. They don't require adhesive and can be easily replaced if damaged. The key spec is density, measured in pounds per cubic foot. A high-density tile (around 50 lbs/ft³) resists indentation from heavy racks and provides better impact absorption than a low-density tile (around 30 lbs/ft³) that will compress and wear out quickly.
- Horse Stall Mats (3/4-inch): The budget champion. Made from recycled rubber, they are incredibly dense and durable. A 4x6-foot mat weighs about 100 pounds. The trade-off is a strong rubber smell that can linger for weeks. Mitigate this by washing them with mild detergent and letting them air out in the sun for a few days before installation.
The Thickness Question
The common advice is 'thicker is better,' but that's not always true. For a dedicated deadlift platform, you want 3/4-inch thick rubber over a plywood base to absorb the impact of a loaded barbell. For general weightlifting areas, 1/2-inch is sufficient to protect the subfloor and dampen noise.
Watch Out Never place a power rack directly on a concrete floor without rubber underneath. The constant point-loading from the rack's feet can cause micro-fractures in the concrete over time, leading to cracks and spalling. A 3/4-inch rubber mat is the minimum for a heavy rack.
Lighting: Lumens, Color Temperature, and Glare
- Color Temperature (Kelvin): Look for lighting in the 5000K to 6500K range. This 'daylight' white light provides the highest contrast and makes it easier to see muscle definition and joint angles. Warmer, yellower light (2700K-3000K) is relaxing but will make your gym feel dim and can hide poor form.
- Lumens, Not Watts: A standard 60-watt incandescent bulb puts out about 800 lumens. For a 100-square-foot gym space, you'll want a minimum of 2000-3000 lumens of overhead light. A single 4-foot LED shop light typically puts out 4000-5000 lumens, making it an excellent and affordable choice.
- Glare and Shadows: Direct, unshielded light can create harsh shadows that obscure your lifting path. Position your main light source directly above the center of your rack, not behind you. If you're using a mirror, avoid placing a light source directly behind you, as it will create a silhouette and make it hard to see your form.
Ventilation: Managing Heat and Humidity, Not Just Airflow
A single box fan pushing air around a room is not ventilation. It's just moving hot air. Your body produces significant heat and moisture during a workout. A 200-pound man can lose over a liter of sweat per hour during intense training.

The CFM Calculation
Ventilation is measured in Cubic Feet per Minute (CFM). For a home gym, you want to exchange the room's air volume every 3-4 minutes. Multiply your room's length x width x ceiling height to get the cubic footage, then divide by 3 for the minimum CFM your fan or exhaust system needs. A standard 20-inch box fan moves about 1000-1500 CFM, but it doesn't exhaust the hot, humid air; it just circulates it.
The Exhaust Strategy
For a garage gym, the best solution is a wall-mounted exhaust fan that pulls air out of the space, creating negative pressure that draws fresh, cooler air in. For a basement gym, a window-mounted exhaust fan is the most effective option. If you have no window, rely on a high-CFM fan for circulation and a dehumidifier to prevent mold and mildew from forming on your mats and equipment.
Acoustic Considerations
The noise from a dropped deadlift or a re-racked squat isn't just an impact; it's a low-frequency vibration that travels through the floor and walls. Rubber flooring handles the impact, but it doesn't stop the sound from transmitting through the structure. Decouple the floor by placing a layer of 1/2-inch acoustical mat under your rubber flooring. This is non-negotiable for any second-story or shared-wall gym.
Soundproofing, Power, and Storage: The Hidden Logistics
This is where most home gyms fail. You can have the best rack and the best barbell, but if you trip a breaker on every run or your neighbors bang on the wall during your deadlift session, your gym is useless.
Electrical Load: The Circuit Breaker Math
Most standard home circuits are 15-amp or 20-amp. A 15-amp circuit on 120-volt power can handle a maximum of 1,800 watts. A 20-amp circuit can handle 2,400 watts. If you exceed it, the breaker trips.
The High-Draw Culprits
- Treadmills: A typical motor draws between 600 and 1,200 watts. During incline or sprint intervals, it can spike higher.
- Smart Bikes and Rowers: Less demanding, usually drawing between 200 and 400 watts.
- Space Heaters and Air Conditioners: The hidden killer. A 1,500 watt space heater on the same circuit as a treadmill will trip the breaker instantly. Never put a heater or A/C unit on the same circuit as your cardio equipment.
- Shop Vacuums: A large shop vac can draw 1,000+ watts. Don't plug it into the same circuit as your rack's accessories.
The Solution: Dedicated Circuits
Before you buy any motorized equipment, check your breaker panel. If your gym is in a garage or basement, it might already be on a dedicated circuit. If not, you have two options:
- Hire a licensed electrician to run a new dedicated 20-amp circuit. This is the safest and most reliable solution.
- Identify which outlets are on which circuits. Use a circuit tester to map your panel. Then, plan your equipment layout so that high draw items are on separate circuits.
Watch Out Never use a power strip as a substitute for a dedicated circuit. Power strips are for low-draw electronics, not for high amperage motors. You will trip the breaker or, worse, start an electrical fire.
Storage: The Vertical Asset Strategy
Wall-Mounted Plate Racks: The most efficient way to store weight plates. They keep plates organized, prevent them from scratching each other, and free up floor space.
Dumbbell Racks: A tiered dumbbell rack is a space saver, but it's also a safety device. A rack that holds dumbbells securely prevents them from rolling and causing injury.
Barbell Storage: Never lean a barbell against a wall. It can roll and fall, damaging the bar or injuring someone. A horizontal wall-mounted barbell holder is a cheap and effective solution.
The Resale Value Angle: Your Gym is an Asset, Not an Expense
This is the angle every other guide misses. When you buy a commercial gym membership, you are spending money on a service that depreciates to zero the moment you use it. When you buy home gym equipment, you are purchasing a physical asset.
What Holds Value:
- Iron Plates: Cast iron and steel plates are virtually indestructible. A used set of Olympic plates will sell for close to what you paid for them, even years later.
- Power Racks: A well-built, heavy-gauge steel power rack is a lifetime purchase. Brands with a strong reputation for durability hold their value exceptionally well.
- Olympic Barbells: A high-quality barbell with a tensile strength of 190,000 PSI or more is a precision tool. It will retain its value if you maintain it properly.
What Depreciates:
- Treadmills and Ellipticals: Complex machines with motors and electronics. They are prone to breakdowns and are expensive to repair. They depreciate rapidly.
- Adjustable Dumbbells: While convenient, they have more moving parts than fixed dumbbells. The plastic and metal mechanisms can wear out.
- Resistance Bands: These are consumables. They stretch out and break. They have no resale value.
The Takeaway:
Prioritize your budget toward the 'iron and steel' assets that hold their value. If you buy a used power rack and a set of used iron plates, you can often sell them for the same price, or even more, in five years. Your home gym isn't a sunk cost; it's a liquid asset you can recoup if your training needs change.
Your Step by Step Plan to Build a Home Gym This Month
Step 1: Define your training goals and pick the 3 to 5 main lifts you will perform. This determines your equipment needs.
Step 2: Measure your space and set a budget. Use the 80 to 150 square foot benchmark to confirm your space works.
Step 3: Purchase the core equipment first. Power rack, barbell, plates, bench, and one conditioning tool. Buy used where possible.
Step 4: Install flooring and set up your equipment layout. Place the rack with adequate clearance on all sides.
Step 5: Address lighting, ventilation, and storage. Install bright overhead lighting, position fans for airflow, and add wall-mounted storage.
Step 6: Test your setup with light weights. Run through your main lifts to confirm you have adequate clearance and that equipment feels stable.
Final Word: Start Training, Stop Overthinking
Building a home gym does not require a massive budget or a dedicated building. It requires a measured space, a prioritized equipment list, and the discipline to start training. Your training space is an investment in consistency, and consistency drives results.
At Tiger Fitness, we support that investment with free workout plans, diet guides, and FREE TOOLS & FITNESS CALCULATORS to help you plan your training and track your progress. Pair that guidance with a quality training app and you have everything you need to build the body you want without leaving your house. Get started with Tiger Fitness and turn that empty corner into the best gym membership you will ever have.
Frequently Asked Questions
What is the cheapest way to build a home gym?
Start with a pull-up bar, resistance bands, and an adjustable dumbbell set. This covers pressing, pulling, and lower body work for under $300. Add a used weight bench and barbell from marketplace listings when your budget allows. Skip machines entirely at first. They take up space and most beginners outgrow them fast. Focus on compound movements with free weights. That's the most cost-effective path to building muscle at home.
How much money is needed to build a home gym?
Plan to spend over $1,000 for quality equipment that lasts, based on current 2026 industry guidance. A basic setup with a squat rack, barbell, weight plates, and bench runs $1,500 to $2,500 new. You can cut costs by buying used plates and racks. Budget another $200 to $400 for rubber flooring and basic accessories. Compare that against a $40 to $60 monthly gym membership and the equipment pays for itself in about two years.
How much space do I actually need for a functional home gym?
A compact, functional home gym needs 80 to 150 square feet. That's roughly a 10x10 or 10x15 room. You need enough clearance to load a barbell, perform squats, and do floor work. Measure your equipment footprint before buying. A squat rack needs about 8 feet of ceiling height for overhead presses. If you're working with less space, prioritize a power tower or wall-mounted pull-up bar and adjustable dumbbells over a full rack setup.
Is it worth it to build a home gym compared to a commercial membership?
Yes, for most consistent lifters. The global home fitness equipment market is projected to grow from $12.88 billion in 2025 to $22.99 billion by 2034, reflecting strong demand. You eliminate commute time, wait for equipment, and monthly fees. The tradeoff is upfront cost and less variety. If you train 3 or more days per week, a home gym pays for itself within 18 to 24 months. If you need classes, pools, or social motivation, keep the membership.
What are the essential pieces of equipment for a beginner home gym?
Your essential home gym checklist starts with a squat rack or power rack, a weight bench, a barbell, and weight plates. Add an adjustable dumbbell set for accessory work and a pull-up bar for upper body pulling. Rubber flooring protects your floor and equipment. Safety clips are non-negotiable. Resistance bands are cheap and useful for warm-ups and mobility work. This setup covers every major muscle group with compound and isolation movements.
What is the 3-3-3 rule for home gyms?
The 3-3-3 rule is a common framework for home gym planning: 3 feet of clearance around equipment, 3 key exercises per session, and 3 sessions per week minimum. It keeps your space functional and your training consistent. The clearance matters most. You need room to bail a failed squat safely and load plates without bumping walls. The training structure ensures you hit full-body work without overcomplicating your routine.
Leave a comment