






BEST SUPPLEMENTS FOR JOINT HEALTH
Modifying Push-Ups With Shoulder Impingement: A Guide
Table of Contents
- Why Standard Push-Ups Aggravate Shoulder Impingement
- Step 1: Fix Your Hand Placement and Width
- Step 2: Adjust Your Range of Motion
- Step 3: Build Scapular Stability With the Push-Up Plus
- Step 4: Choose Push-Up Alternatives for Shoulder Pain
- Step 5: Add Shoulder Impingement Physical Therapy Exercises
- Step 6: Support Recovery With the Best Supplements for Joint Health
- Common Mistakes to Avoid When Modifying Push-Ups
- Frequently Asked Questions
Last Updated: October 3, 2026
Why Standard Push-Ups Aggravate Shoulder Impingement
Shoulder impingement is a condition where the tendons of your rotator cuff get pinched in the subacromial space, the narrow gap under the bony arch of your shoulder. According to Pliability's 2026 report on shoulder impingement exercises, 70% of people with shoulder impingement get pain relief through exercise therapy. But the wrong exercise makes it worse.
Here's the deal. The standard push-up is a great movement. It's also a movement that punishes bad shoulder mechanics. If your shoulder blade doesn't rotate and stabilize properly, the head of your humerus grinds up into that subacromial space on every rep. Do that 50 times a session and you've got a recipe for biceps tendonitis and rotator cuff irritation.
The Mechanics of the Subacromial Space
The subacromial space is the gap between the top of your humeral head and the acromion, a bony hook on your shoulder blade. Tendons and bursa sit in that gap. When your arm moves overhead or your shoulder blade fails to rotate upward, that gap shrinks.
The push-up forces your shoulder into a position where the humerus can migrate upward if your scapular stabilizers aren't doing their job. Research from the National Center for Biotechnology Information shows that scapular kinematics change significantly during push-up variations, which matters if your shoulder blade isn't moving right.
Pain Triggers to Watch For During Movement
Pain during a push-up isn't random. It shows up at specific points:
- A sharp pinch at the front of the shoulder as you lower down
- Pain that worsens as you press back up
- A clicking or catching sensation mid-rep
- Dull ache that lingers after your workout
If any of these sound familiar, stop. That's your body telling you the joint mechanics are off.
Watch Out Pushing through shoulder pain during push-ups doesn't build toughness. It builds inflammation. The tendons in the subacromial space don't get stronger from irritation, they get weaker.
Step 1: Fix Your Hand Placement and Width
Hand placement is the fastest fix you can make. The standard push-up has your hands just outside shoulder width. Widen them too much and you increase the shear force on the front of the shoulder.
Here's what to do:
- Place your hands directly under your shoulders or just slightly wider
- Turn your hands out about 10-15 degrees, a neutral grip that takes pressure off the joint
- Stack your wrists under your elbows, not outside them
- Grip the floor and rotate your elbows back toward your ribs
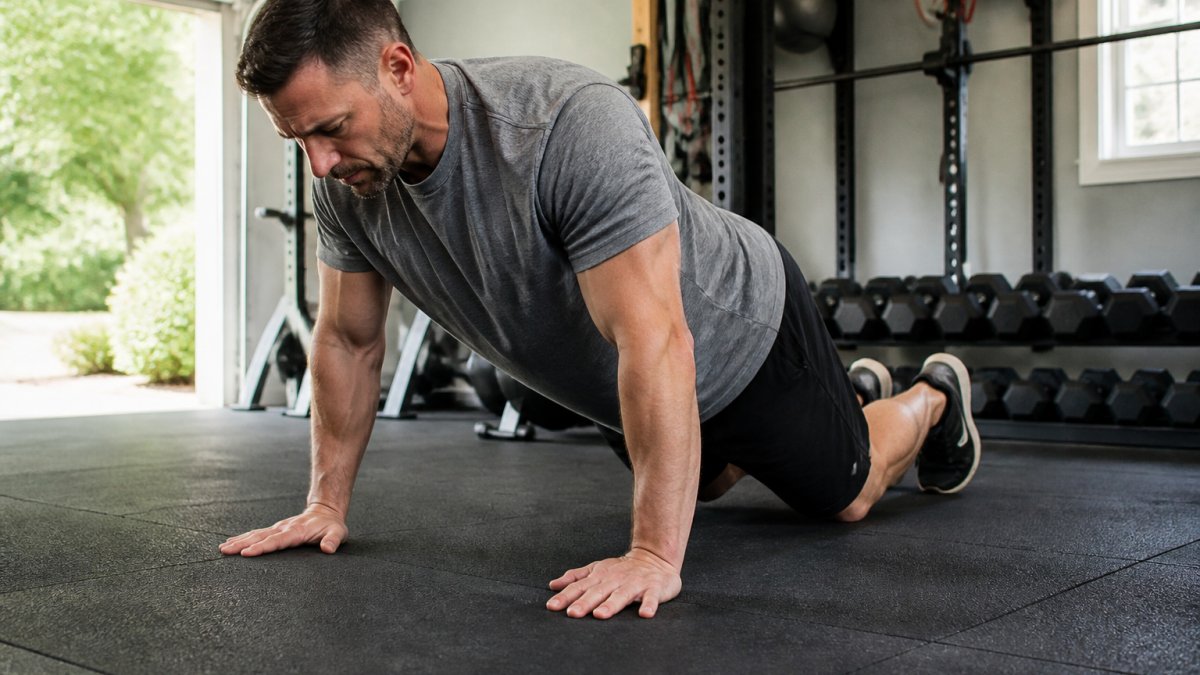
Elbow tracking matters just as much. If your elbows flare out to 90 degrees, you're putting your shoulder in its most vulnerable position. Keep them at about 45 degrees from your torso.
Step 2: Adjust Your Range of Motion
You don't need to touch your chest to the floor. Full range of motion is great for healthy shoulders. For an impinged shoulder, it's a trap.
Cut your depth. Stop when your upper arms are parallel to the floor. That keeps the humeral head from migrating up into the pinch zone. As your shoulder tolerates more, you can go deeper over weeks, not days.
Partial reps done pain-free beat full reps done in pain. Every time.
Step 3: Build Scapular Stability With the Push-Up Plus
The push-up plus is the single best variation for shoulder impingement. It trains your serratus anterior, the muscle that pulls your shoulder blade forward and up, which opens the subacromial space.
A 2025 study in the Journal of Archives in Military Medicine found that modified push-up plus exercises using biofeedback increased serratus anterior activity while decreasing overactive pectoralis major. That's exactly what you want.
How to do it:
- Get into a push-up position with hands under shoulders
- Lower down and press back up
- At the top, push the floor away and round your upper back slightly
- Hold that extra push for one second
- Return to neutral and repeat
Start with 2 sets of 8. Add reps before you add load.
Step 4: Choose Push-Up Alternatives for Shoulder Pain
Push-up alternatives for shoulder pain let you train your chest and triceps without wrecking the joint. But the real leverage isn't just picking a different exercise, it's changing the angle of your wrist and shoulder with equipment. That's the part most articles skip, and it's the part that actually keeps you training.
Here's the tool-by-tool breakdown.
Parallettes and Push-Up Bars
Parallettes put your wrists in a neutral grip instead of full extension. That single change takes the shoulder out of internal rotation at the bottom of the rep, which is exactly the position where the humeral head migrates up into the subacromial space. If a flat-hand push-up pinches and a parallette push-up doesn't, you just found your fix. Start with low parallettes (4-6 inches) so you don't add extra depth you haven't earned.
NOW Solutions Joint & Muscle Cream →
Rings
Rings are the most demanding option and the most honest. They force your scapular stabilizers to work on every rep because the surface moves. For an impinged shoulder, that's a double-edged sword: great for rebuilding control, brutal if you jump in too fast. Use rings only after you can do pain-free push-up plus reps on the floor. Keep the rings high, keep your feet on the ground, and treat every rep like a scapular drill, not a chest day.
Bands
A band looped around your upper back and held in each hand adds accommodating resistance at the top of the press, the range where your shoulder is safest. That lets you load the movement without loading the pinch zone. Loop bands over a rack for band-resisted presses, or use a light band for scapular pull-aparts between sets.
The Alternatives Table
| Alternative | Best For | Shoulder Load |
|---|---|---|
| Incline push-up | Beginners, early rehab | Low |
| Wall push-up | Very sensitive shoulders | Very low |
| Parallettes push-up | Wrist-sensitive shoulders, neutral grip | Low |
| Band resisted press | Building strength without joint stress | Moderate |
| Landmine press | Pressing pattern, overhead athletes | Low to moderate |
| Dumbbell floor press | Heavy pressing, limited range | Moderate |
| Ring push-up | Advanced scapular control | High |
The incline push-up is still the best starting point. Put your hands on a bench, box, or counter. The higher your hands, the less load on your shoulder. Once that's pain-free for two weeks, move to parallettes before you move to the floor.
Pro Tip Elevate your hands on a stable surface and keep the same elbow tracking cues. Most people can go back to floor push-ups within 4-6 weeks if they progress slowly and stay pain-free. If parallettes let you press without a pinch, use them as your bridge back to flat-hand push-ups.
Step 5: Add Shoulder Impingement Physical Therapy Exercises
Shoulder impingement physical therapy exercises rebuild the muscles that control your shoulder blade. Without them, you're just avoiding the problem, not fixing it.
The core movements:
- Band pull-aparts for rear delts and scapular retraction
- Wall slides for upward rotation and thoracic mobility
- External rotation with band for rotator cuff strength
- Scapular retraction holds for stability training
- Thoracic extensions for better overhead reach
Do these 3-4 times per week. Two sets of 12-15 reps each. They're not glamorous, but they work. A case study from Capital Area Physical Therapy documented a 33-year-old male with two months of shoulder pain who resolved his symptoms through targeted rehabilitation.
Step 6: Support Recovery With the Best Supplements for Joint Health
The best supplements for joint health support recovery, but they don't replace smart training. Nothing does.
What we recommend at Tiger Fitness:
- Collagen peptides for connective tissue support. Our BlackStone Labs Collagen Peptides mixes into any shake and supports tendons and ligaments.
- Cissus quadrangularis for joint comfort. USPLabs SuperCissus uses this botanical for joint and connective tissue support.
- Topical comfort for localized relief. NOW Solutions Joint & Muscle Cream absorbs fast and works on shoulders, knees, and hands.
Pair these with the free recovery tools in our fitness calculators to track your progress.


Key Takeaway Supplements support recovery. They don't fix bad mechanics. Get your push-up form right first, then add joint support on top.
Common Mistakes to Avoid When Modifying Push-Ups
The biggest mistake is going too fast. Most people cut their range for three days, feel better, and go right back to full push-ups. Then the pain returns. The second biggest mistake is ignoring what you do in the 30 minutes after your last rep.
The Post-Push-Up Recovery Window
Here's what nobody talks about. The damage from an impinged push-up doesn't peak during the set, it peaks in the hours after, when inflammation builds in the subacromial space. What you do immediately after training decides whether tomorrow is a training day or a rest day.
A simple protocol that works:
- Cool down the joint. Two to three minutes of light arm swings and shoulder circles to restore blood flow without loading the joint.
- Soft-tissue work. Use a lacrosse ball or massage gun on the pec minor, lats, and rear delts, not directly on the front of the shoulder. Tight pecs and lats pull the humeral head forward and shrink the subacromial space.
- Ice only if it's hot. If the shoulder feels inflamed, 10-15 minutes of cold is fine. Don't ice a shoulder that feels fine, you'll blunt the recovery response you want.
- Sleep position matters. Don't sleep on the impinged side. Stack a pillow under the affected arm if you sleep on your back.
Form Mistakes That Keep You Hurt
- Shrugging the shoulders toward the ears during the press
- Flaring elbows out to 90 degrees
- Skipping scapular stability work because it's boring
- Training through sharp pain instead of backing off
- Adding weight before earning full pain-free range
- Chasing soreness instead of tracking pain-free reps
Track It or Repeat It
Keep a simple log: date, variation, sets, reps, and a 0-10 pain score during and 24 hours after. If the 24-hour score climbs above a 2, you went too hard. That single data point will tell you more than any article, including this one.
The shift toward closed kinetic chain exercises like the push-up plus is real. According to Physiopedia, its use for shoulder dysfunction has grown because it trains the shoulder girdle the way it actually functions.
Key Takeaway Smart training gets you out of pain. Smart recovery keeps you out. Do both, or you'll be back here in six weeks reading the same article.
Frequently Asked Questions
Can I still do push-ups if I have shoulder impingement?
Yes, but you need to modify them. Research shows 70% of people with shoulder impingement get pain relief through exercise therapy. The key is keeping your hands slightly outside shoulder width, tucking elbows to about 45 degrees, and stopping before your shoulder shrugs toward your ear. If any rep causes sharp pain, back off and work on scapular stability with push-up plus variations first.
What are the best push-up alternatives for shoulder pain?
Incline push-ups, wall push-ups, and dumbbell floor presses are your best bets. These reduce the load on the subacromial space while still training your chest and triceps. Band pull-aparts and wall slides also help retrain scapular retraction. The goal is progressive loading without triggering impingement symptoms, so start easy and add difficulty as pain-free range improves.
How do I modify my hand position to reduce shoulder stress during push-ups?
Place your hands just outside shoulder width, not wide. Keep your wrists stacked directly under your elbows and rotate your hands slightly outward (about 10-15 degrees). This creates external rotation at the glenohumeral joint and opens the subacromial space. Avoid letting your elbows flare past 45 degrees from your torso, which increases impingement risk.
Should I avoid chest exercises with shoulder impingement?
You do not need to avoid them entirely, but you do need to modify. Bench press and overhead press can work if you use a neutral grip, limit range of motion to pain-free zones, and focus on scapular retraction before each rep. Studies show hand position and fatigue alter scapular kinematics, so stop sets when form breaks down. Always consult a physical therapist for a plan tailored to your shoulder.
Shoulder impingement doesn't mean you stop pressing forever. It means you press smarter. Fix your hand placement, cut your range, build scapular stability, and support your joints with quality nutrition. Tiger Fitness carries the collagen, joint support, and recovery products to keep you training, plus free workout plans and calculators to guide your comeback. Get started with Tiger Fitness and rebuild your pressing strength the right way.
Leave a comment